The Folio Routing feature in HotelRunner PMS allows specific transaction items posted to a guest’s folio to be automatically transferred to another folio or another guest’s account based on rules you define. This feature eliminates the need for manual folio transfers.
There are two types of Folio Routing options available:
- Routing to a different folio within the same reservation
- Routing to a different reservation account
Routing to a Different Folio within the Same Reservation
This method is typically used to separate a guest’s accommodation charges from their extra expenses (e.g., food & beverage, spa) for separate invoicing.
Step-by-Step Guide
- Prerequisite: Create a Second Folio
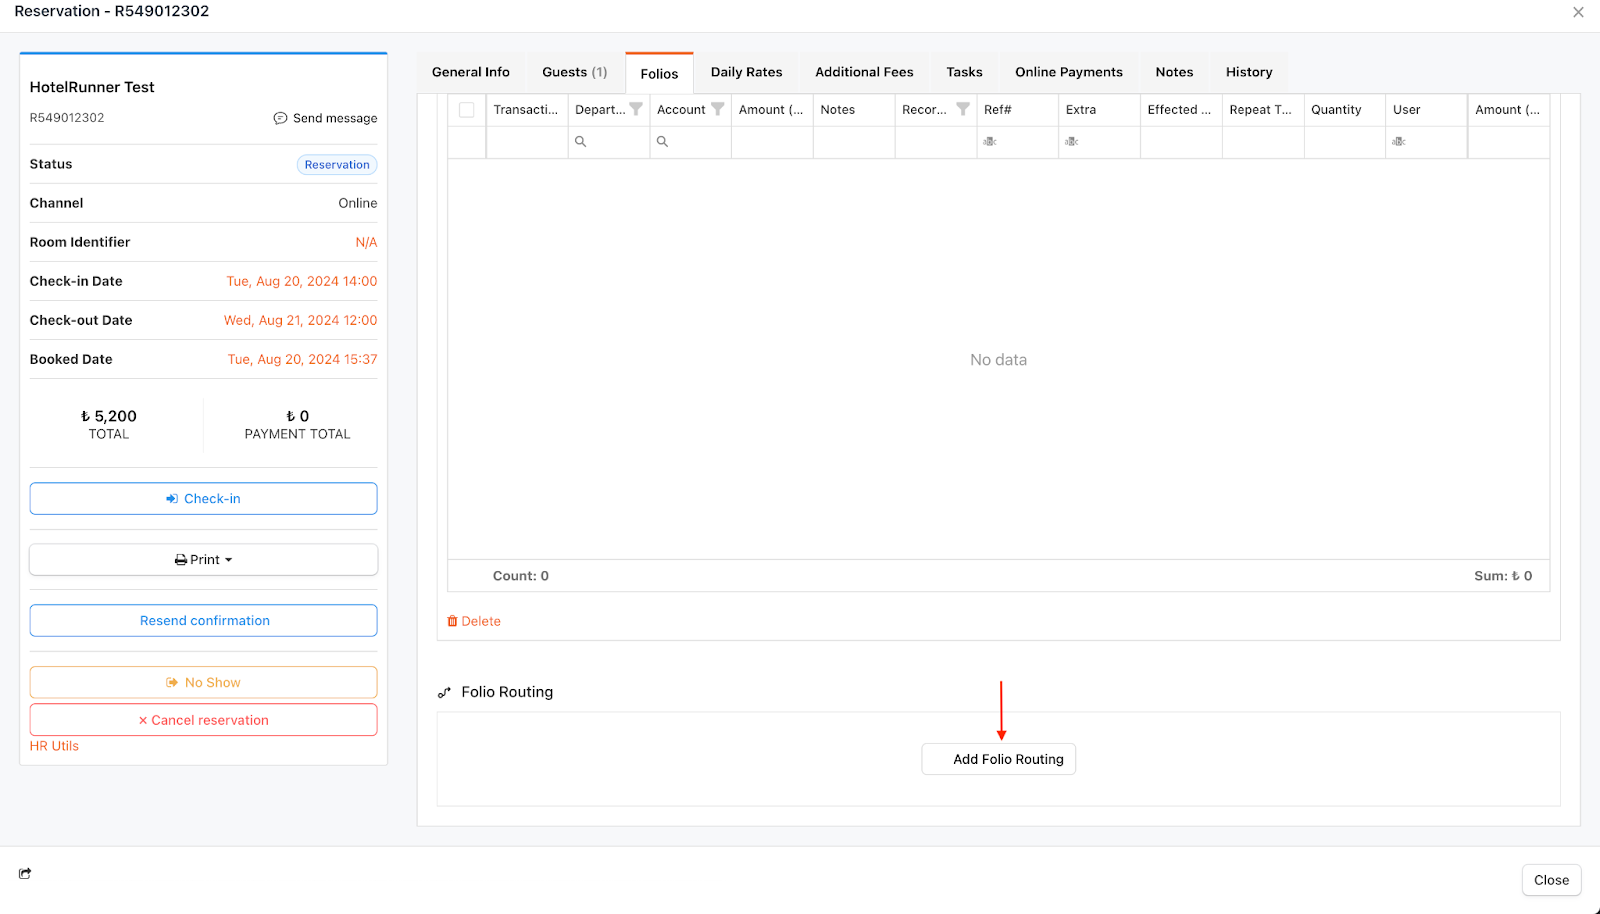
- Open the Folios tab of the relevant reservation.
- If one doesn’t already exist, click the Add Folio button to create a second folio where transactions will be routed.
- Initiate the Routing
- While in the Folios tab, click the Add Folio Routing button.
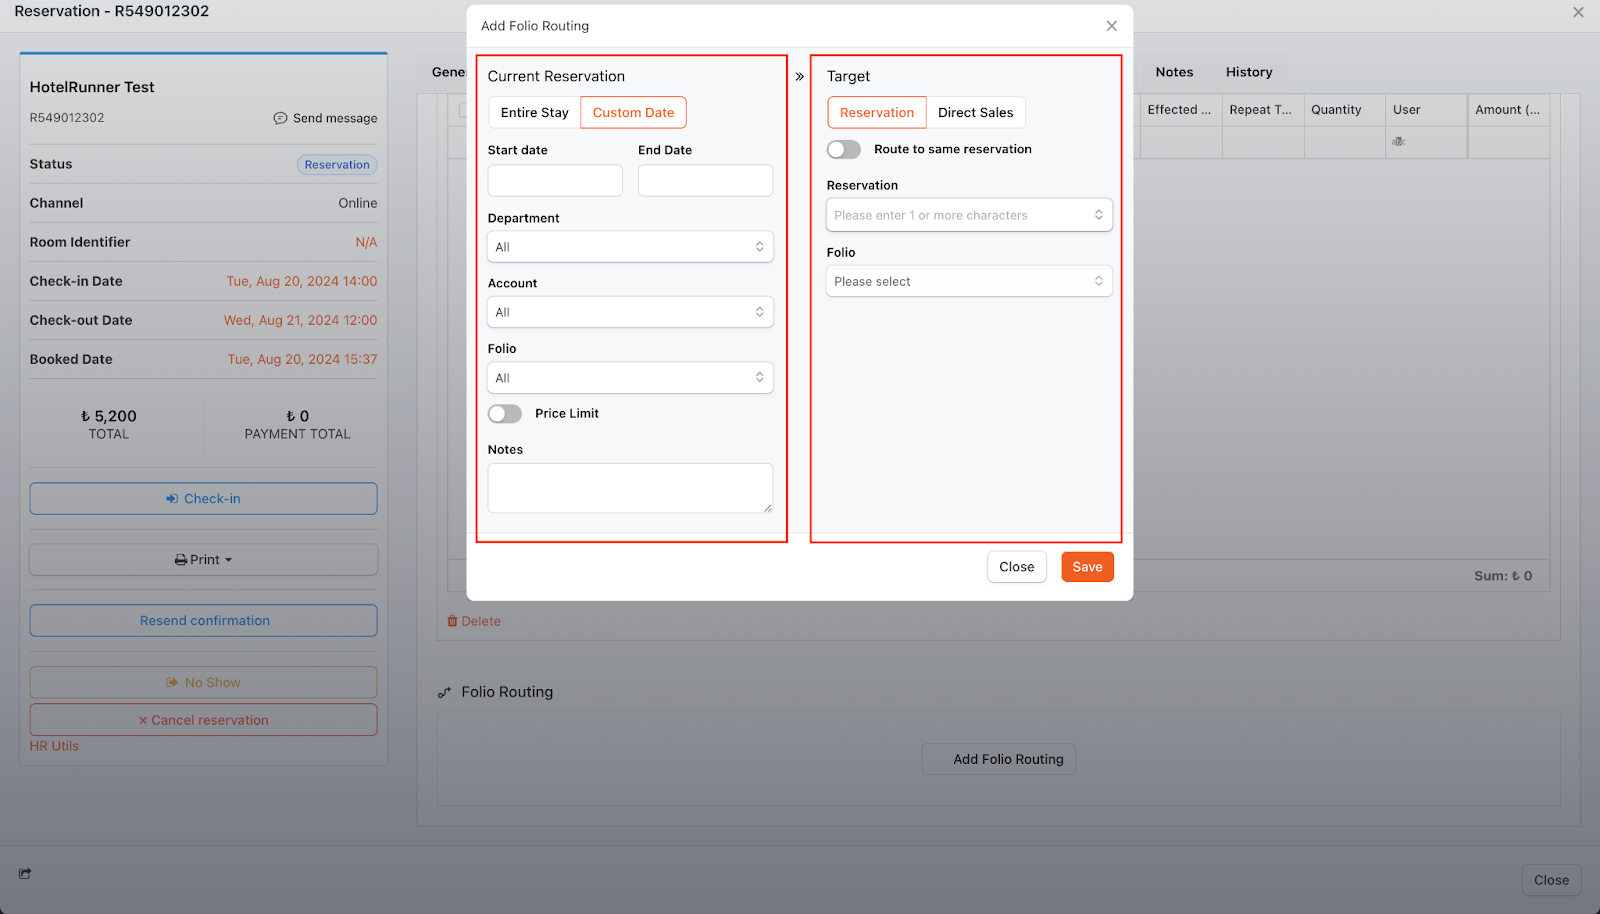
- Configure the Source (Left Side)
- Time Frame: Choose if the routing will apply for the Entire Stay or a specific Custom Date range.
- Items to Route:
- Department: Select specific charge departments (e.g., only Accommodation or F&B) or choose All.
- Account: Select the sub-revenue item linked to the department.
- Source Folio: Choose the folio from which the items will be taken (usually the main Folio 1).
- Price Limit (Optional): You can set a maximum amount to be routed. Any amount exceeding the limit will remain in the source folio.
- Configure the Target (Right Side)
- Leave the Route to same reservation option checked.
- Folio: Select the target folio where the charges will be routed (e.g., Folio 2).
- Click the Save button.
🔔 Result: After this rule is created, any specified charge items posted to Folio 1 will be automatically transferred to Folio 2.
Routing to a Different Reservation Account
This method is used when one guest’s charges are to be paid by a different guest staying in another room.
Step-by-Step Guide
- Initiate the Routing
- Open the Folios tab of the source reservation (the one whose charges will be routed).
- Click the Add Folio Routing button.
- Configure the Source (Left Side)
- Fill in the Time Frame, Department, Account, and Price Limit settings as in the previous method. These settings determine which charges will be routed.
- Configure the Target (Right Side)
- Ensure the Reservation button is selected.
- Uncheck the Route to same reservation option.
- Reservation: From the dropdown list, select the target guest’s reservation.
- Folio: Select the specific folio within the target reservation where the charges will be transferred.
- Click the Save button.
🔔 Result: After this rule is created, the relevant charges posted to the source reservation will be automatically transferred to the folio of the other guest you selected.
Managing Existing Rules
You can view all your created routing rules in the Folios tab. From there, you can edit, temporarily deactivate (pause), or archive them as needed.