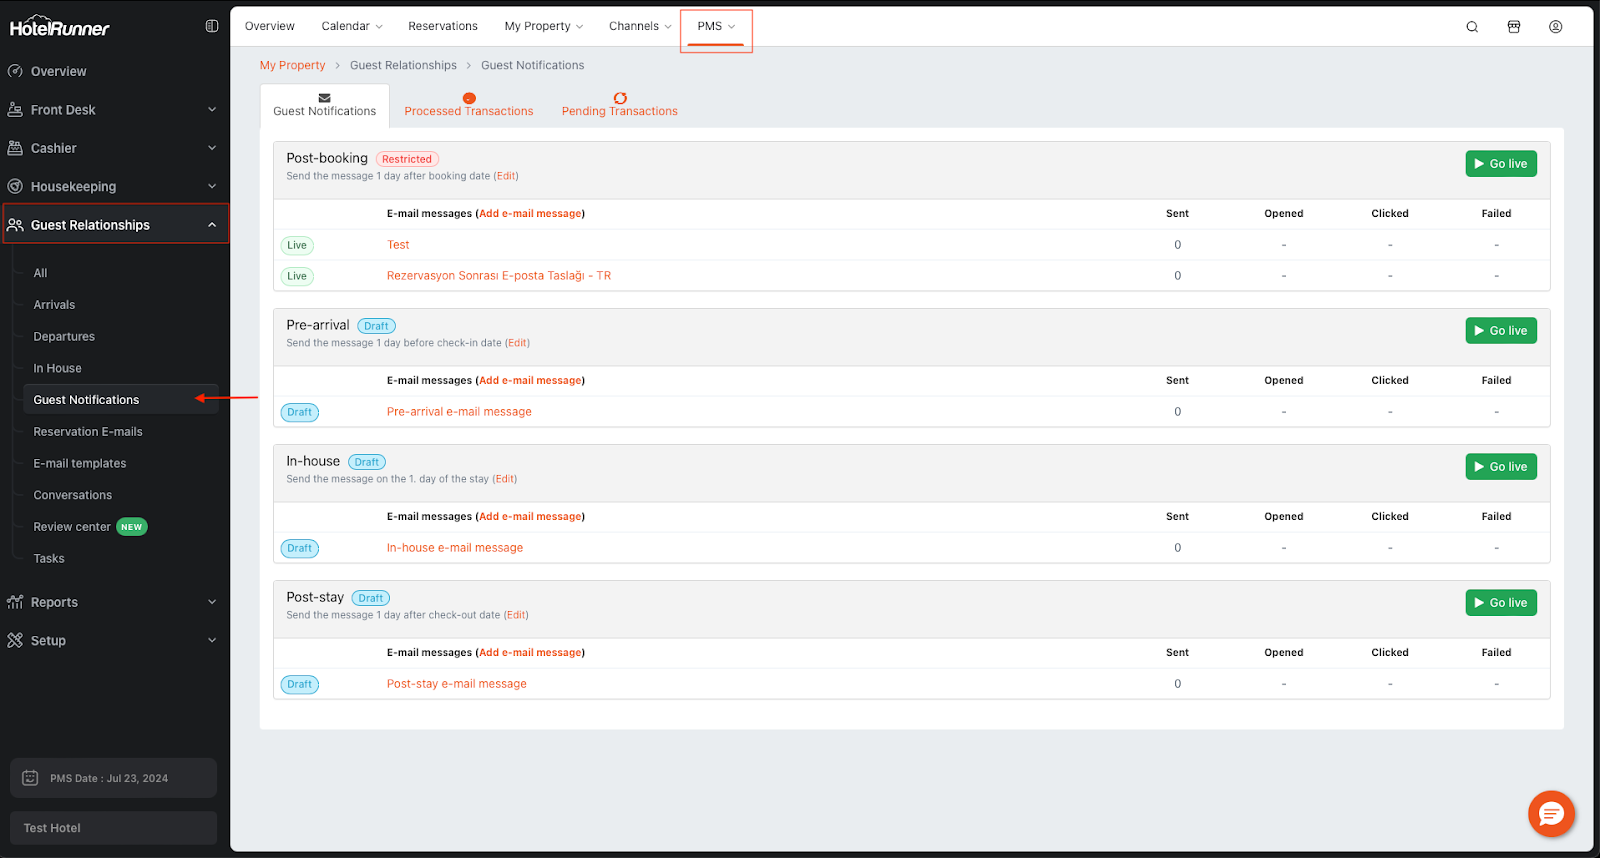
The Guest Notifications section under the Guest Relations menu allows you to manage automated email notifications sent to guests at different stages of their journey:
-
After Reservation: Automatically sent once the booking is completed.
-
Before Check-in: Sent prior to arrival to share reminders, check-in details, or special offers.
-
During Stay: Sent while the guest is staying to provide information or promote services.
-
After Check-out: Sent after departure for feedback, thank-you messages, or future offers.
Detaylar:
Access and Scheduling
- Access: To access this section, navigate to PMS > Guest Relations > Guest Notifications.
- Email Sending Schedule: Click the Edit button next to each notification heading (e.g., Pre-Check-in) to specify when the selected email should be sent.
Creating and Editing Email Templates
- Use the Add Email Message button to create a new email template or click on an existing one to edit it.
- Basic Settings:
- Title: Enter the name of the template for your internal reference.
- Subject: Define the subject line of the email that the guest will see.
- From and Reply To: Check the sender’s name and the email address where guest replies will be sent.
- Design: You can choose one of three pre-customized templates or use your own HTML code.
- Sending a Test: Click the Send test email button to send a test of your draft to the specified reply-to address.
Customizing Content and Rules
- Text Content: Click in the middle section of your saved draft to customize the email’s body content.
- Dynamic Data: While editing, use the Variables field to insert dynamic, hotel-specific data like the hotel name, guest name, or room type to personalize the email.
- Defining Rules: In the Rules tab, you can set up rules to send specific emails based on the guest’s country or the reservation’s source channel. For example, you can send a Spanish-language email to guests from Spanish-speaking countries.
Managing and Publishing Templates
- Publishing Options:
- Save and publish: Saves the email template and makes it live.
- Save as draft: Saves the template without publishing it.
- Overall Activation: To activate all templates under a main notification heading, the main Go live button must be clicked.
- Pausing in Bulk: Use the Pause button to stop all saved email templates under a specific heading from being sent.
Monitoring Sending Status
You can track the status of your emails from the tabs on the main page:
- Completed Transactions: Lists all emails that have already been sent.
- Pending Transactions: Displays emails that are scheduled to be sent automatically at their designated time.