How to create a new reservation
This how-to document explains step-by-step how to manually create a new reservation using the HotelRunner dashboard.
Reservations created here are deducted from your general inventory, updating the availability information on all your calendars in real-time.
Starting the Reservation Process
You can initiate the new reservation process from any of the following interfaces:
- PMS > Front Office > Room Calendar
- PMS > Front Office > Check-in
- PMS > Front Office > In-House
- PMS > Front Office > Check-out
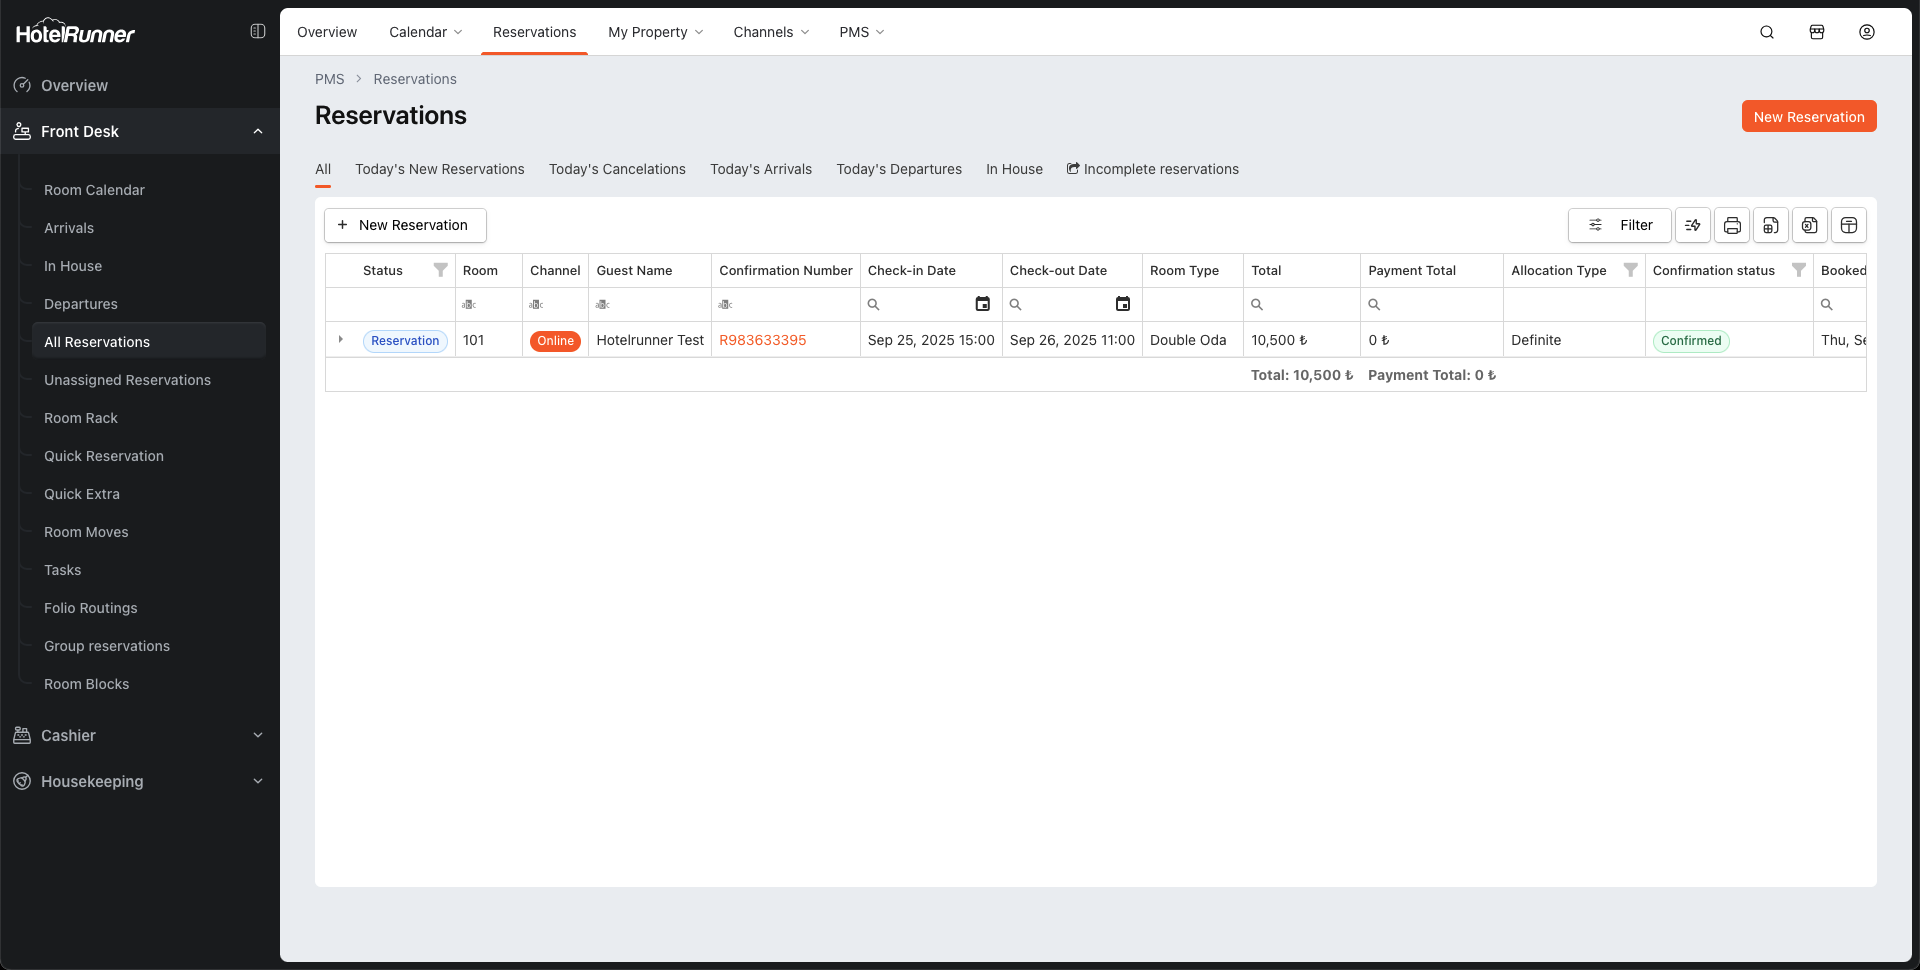
- PMS > Front Office > All Reservations
When you click the New Reservation button on these pages, a three-stage process begins, which is the same for all methods.
The Three Stages of Reservation Creation
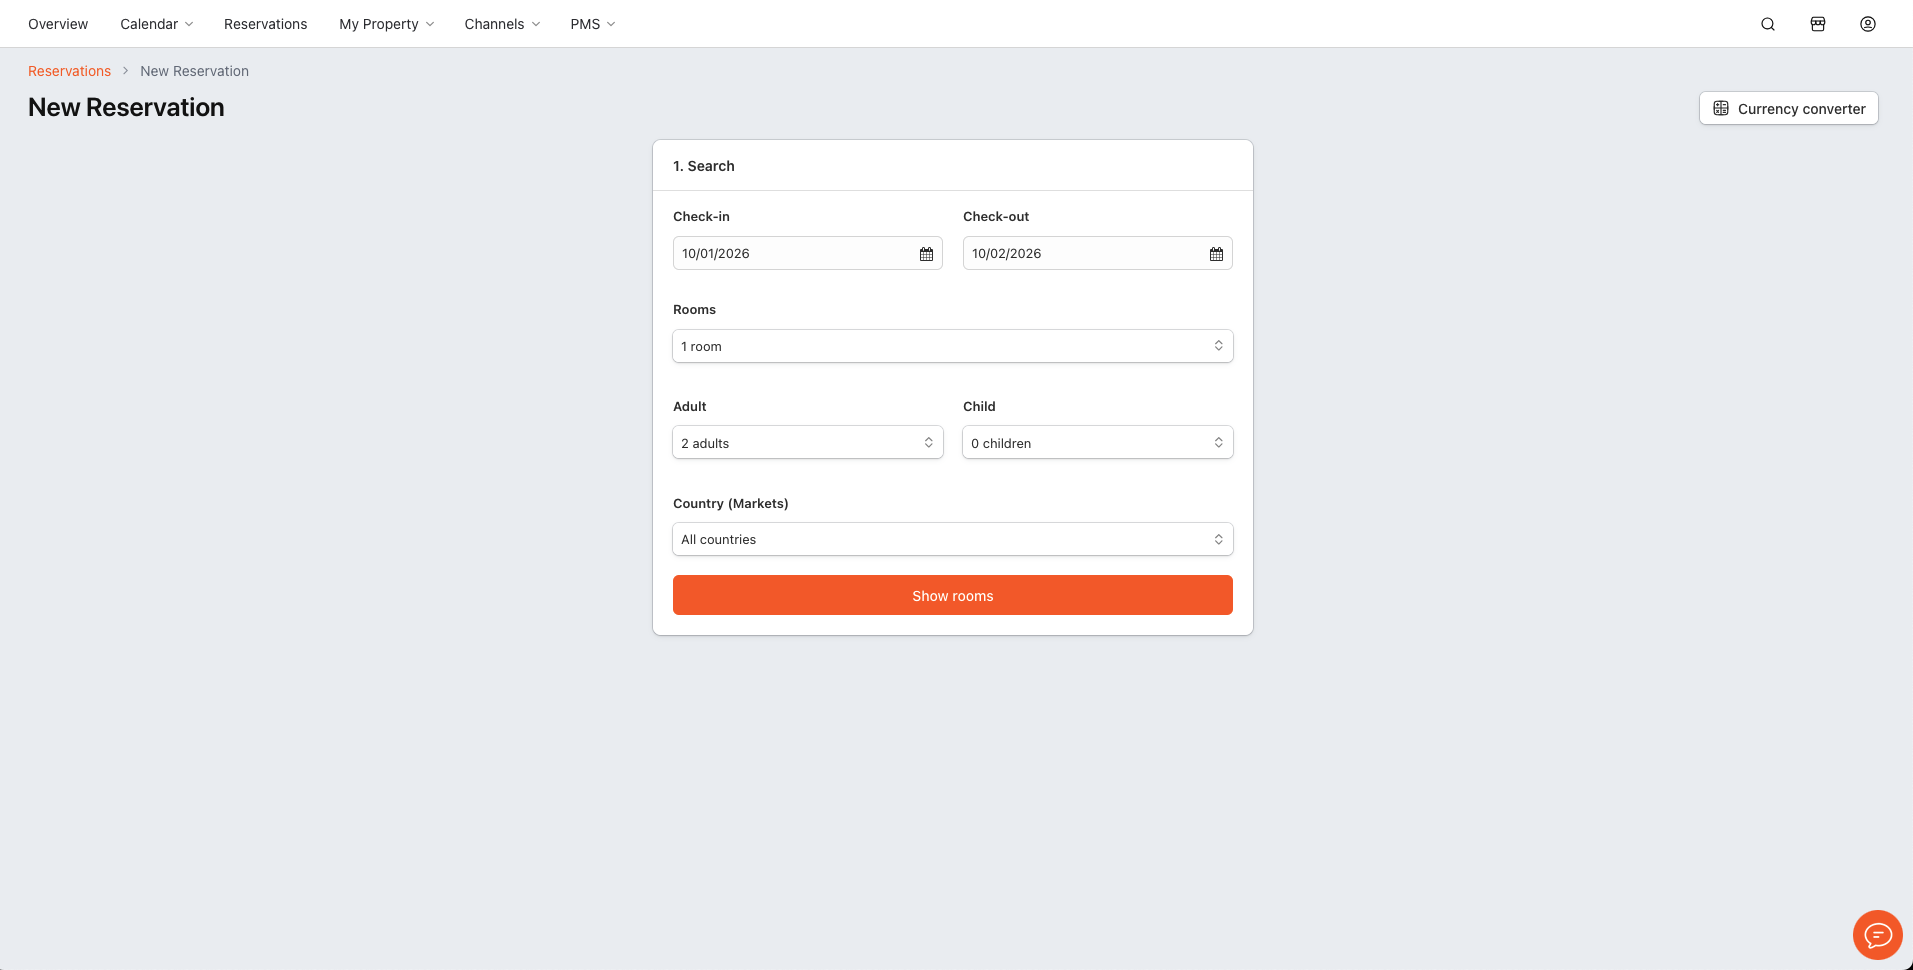
Stage 1: Searching for Accommodation Details
In this first stage, the basic criteria for the reservation are defined.
- Check-in and Check-out: Select the accommodation date range.
- Rooms: Specify how many rooms to book. (Note: You can create a bulk booking for up to 10 rooms at the same time.)
- Adult and Child: Enter the number of guests.
- Country (Markets): If there is a specific market price applicable to the reservation, select the relevant country. Otherwise, you can leave it blank.
After entering the criteria, proceed to the next stage.
Stage 2: Selecting Room Type and Price
In this stage, the room type for the guest’s stay and the applicable price are determined.
Note: If a price is not selected or entered in this stage, the final button to complete the reservation will not be active.
Room Type Selection: Choose the room type or types to be booked from the list. You can check the availability next to the room type. (Note: You can create a multi-room reservation by selecting more than one room type at once.)
Pricing:
Show rates: Displays the total accommodation fee for the entire stay, not the nightly (daily rate).
Price adjustment: Allows you to modify this displayed price. You can apply a net or percentage increase/decrease with Price adjustment or set a new total amount directly with Final price.

Stage 3: Entering Guest and Reservation Information
In this final stage, all the details pertaining to the reservation are entered.
Contact Information:
- Main Contact: Select the main guest profile for the reservation or create a new individual profile with the Add button.
- Channel (Agency), Channel Source, Company: Select existing profiles or create new ones in the relevant fields.
Reservation Details:
- Provider Number: Assign an external reference number to the reservation.
- Accommodation Type: Specify the nature of the stay (Standard: Paid, Comp: Complimentary, H-Use: House-Use for staff).
- Allocation Type (Guarantee Status): Choose between Definite (guaranteed) or Tentative (non-guaranteed).
- Reservation Source: Indicate how the reservation was received (Phone, Email, Walk-in, etc.).
Notes, Payment, and Room Assignment:
- Note: Add special notes to the reservation.
- Add Payment: Post a received payment directly to the folio during creation.
- Room Number: Assign a room number at this stage if desired.
3. Finalizing the Reservation
After entering all the information, the final step involves a checkbox that determines the reservation’s guarantee status and changes the final button accordingly.
- “This reservation has been confirmed” Option: This is a checkbox.
- If this box is CHECKED: The button at the bottom of the screen will turn green and read “CONFIRM [X] room(s) for [Total Price]”. This creates a guaranteed reservation.
- If this box is NOT CHECKED: The button will read “BOOK [X] room(s) for [Total Price]”. This creates a non-guaranteed (tentative) reservation.
🔔 Note: In both cases (whether confirmed or booked), the number of selected rooms is deducted from the property’s general availability. The only difference is the guarantee status of the reservation in the system.
Once you click the button, the reservation is created, and the Reservation Card interface will open, where you can manage all its details.